Replacing French Door Glass
It is fairly simple to replace a broken glass pane in the French Door. It involves cleaning the glass pane and removing molding or trim, and putting in an entirely new window pane.
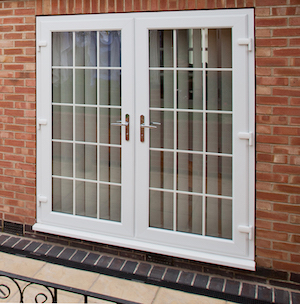
French doors are made of multiple glass panes that are separated by muntin bars. They are also referred to as mullions. They are available in a wide range of configurations and are able to be triple-paned to cut down the noise and reduce glare.
How do you replace a broken pane of glass
Before starting the replacement process, wear gloves made of rubber and safety glasses to protect yourself from any fragments of broken glass that might fall off during the replacement process. Also work in a garage or other open space and keep children out from the area. For easier access it is recommended to remove the window frame from its ledge. However you can still replace the pane, but without removing the entire frame.
Start by scraping off any old glazing compound or caulking around the edges of the sash with a putty knife. You don't want to damage the wood molding holding the window in place. You will need it to hold the new window.
If you're working with a steel casement window it might be anchored by metal glazing points. These points, along with the old putty, require removal before you can remove the window from the frame. Paint scraper or chisel can work. If the putty is difficult to remove, you could make use of a heat gun to soften it. Keep the heat gun approximately 1 inch away from the glass and move it around to spread the heat. Place two sheets of aluminum foil on the adjacent panes to keep them from cracking because of the heat.
After the old glass has been removed, clean the inside of the window sash using a damp cloth to wash off any dust or dirt. You can now install a new piece glass.
To cut a glass piece to size, first determine the width and the height of the existing opening. Record these measurements and subtract 1/8 inch from all sides to order a new pane that is able to fit into the door frame. Many hardware stores will cut a piece glass for you if you supply the measurement.
Warm a handful of putty in your hands before rolling it into a rope that is 3/4 inch thick. Set the putty in a position that is against one side of the rabbet, and then rest your putty knife's blade at a 45-degree angle to the frame's rabbet. The knife should be pulled across the edge of the glass in a smooth, straight line to cut a section of the pane. Repeat the procedure with the other edges of the pane. Then, scrape off the excess putty.
Take the broken Pane
A broken glass pane in the frame of a French door isn't just an eye sore it's also a danger to safety. It's simple to replace a pane in a French-style door, and it's generally less expensive than replacing the whole door panel. The majority of homeowners are able to complete the task by themselves, however professional assistance is available to those who require specialized tools or expertise.
Begin by taking out any cracked or broken fragments of the frame. Wear safety goggles and gloves to keep glass shards from entering your eyes or face. Then, clean the glass pane opening to get rid of any remaining caulking or putty that was used to keep the old pane in place.
The next step is to remove the molding or trim that is holding the glass in place. It may be difficult to pry the molding out. Wearing protective equipment and having a person help you in prying is an ideal idea. Label the pieces that you're removing so that you can return them to their original location.
Installing the glass is simple once the molding has been removed. Visit a glass shop and measure the glass's opening. You should purchase safety glass for your French door, since it won't break easily if they break again.
When you are ready to place your glass piece in the opening, make sure that it is aligned correctly. Then, apply a thin bead of clear silicone caulk around the edge of the glass.
After the caulk has dried, you can replace the molding. If the original nails didn't penetrate the molding, you can put in new wire nails to fill in the holes left behind by the old ones. The holes should be predrilled to prevent the nails from splitting through the molding. You can make holes using tiny bits from hardware stores that are well stocked.
How to cut a New Pane Of Glass
Check the spacing around the frame of the window as well as the edges prior to ordering a replacement pane. If you find any gaps, you might have to adjust the spring clips or the metal triangles that secure the glass in place. It is also important to make sure that the new pane is a appropriate size for the opening; if it's too large, you may experience leakage or other problems when it's put in.
The first step is preparing a work surface. With a putty knife scrape away the old compound on both sides of the frame to expose bare wood. If the rabbets on the frame are too rough to smooth out using a knife and you want to smooth them out, lightly sand them and apply an exterior primer. This will stop the new glazing from absorbing moisture from wood, thereby reducing its lifespan.
Once the frame is cleaned and prepared, you can knead a handfull of putty until it's soft and malleable. Utilize the putty knife to apply a thin layer of it to the inside corners of the rabbets, creating an even bed for the glass to rest on. Repeat the process for the other edges that are exposed on the rabbets.
Once the putty has dried take any remaining metal glazing points from the grooves within the sash. Before you attempt to remove them, wear goggles that are safe to protect yourself from glass fragments. A heat gun on the lowest setting will help you warm and loosen the metal to allow you to bend it out of the frame with pliers.
After the glass and frame are in place, test it by sliding it into place. Adjust the glass as necessary before securing it with spring clips or triangulars made of metal. Make sure that the gap between the frame and the glass is uniform and even across all sides. You can also test the sash's movement to ensure that the new glass will not interfere with closing or opening the window. If you encounter any issues with the installation, consult a professional specializing in restoration to assist you restore and maintain your historic home.
Install the Pane of Glass
Test-fit the new glass pane to ensure that it fits properly before putting it in place. Find the width and the height of the window's opening, in relation to the edges of the L-channels. Subtract 1/8 inch from each measurement to determine the size of the glass you need to order. It will be much easier to install the glass when you are a little smaller than. This will also allow for seasonal expansion and contraction of the frame. You can take your measurements to the hardware store or home centre and they will cut a piece of glass for you.
RepairMyWindowsAndDoors can cut the glass yourself, if you have a large piece available.
After removing the glass pane and cleaning the window sash grooves. Remove any glazing points used to hold the old pane. This can be done using a scraper that is a type of pull, or a chipper. If the grooves contain lots of putty that is hardened you can soften it with a heat gun. Cover the moldings and windows with aluminum foil in order to keep them safe from heat.
Scrape and sand the rabbets where the glass sits, brushing an exterior primer over them to stop the putty from drawing out its natural oils and shortening its lifespan. You should also wipe down the sash to get rid of any dirt and dust from the grooves.
Put a small amount of the mixture into the rabbets, in which the glass will be placed. At this point, it's not about neatness. Put the new pane into the rabbets, then move it around and apply even pressure with your fingers to ensure it's seated properly.
Fill any holes in the frame with silicone caulk. Then, you can install the new glass. If the frame has other mechanisms for fastening, such as L-channels, use a hammer to pry them out from the sash grooves. Inspect the frame for glass fragments that might have broken during removal, and take them out of them before continuing. Then, apply a layer of clear silicone caulk over the bottom edge of the frame, where it joins the floor to keep water and pests out of the house.


 icons at the top right corner of the subsection.